Discussion forums

Communication with your tutor and fellow students is an important part of most online courses. For fully online courses the discussion forums will form the heart of the study experience and will be the tool you use most to communicate with your tutor and other students.

With forums so core to the experience of our online courses, they can often become very busy, if not overwhelming. Please read the sections How can I easily see the most recent posts and How to subscribe to and unsubscribe from discussions below which should help you manage your interactions with your tutor and other students.

At the moment Moodle allows the use of emojis such as smileyIcon. You can either use the individual characters in the message box and Moodle will automatically convert them to the emoji when the message is posted, or you can insert an emoji from the text editor menu. So smileyIcon would be typed :-). If you try to add an emoji in any other way Moodle will automatically remove it when the message is posted.

In every course there are 3 types of forums, each with a different purpose:

  • The News Forum is used by your tutor, the IT Support team and your course administrators to communicate important course related information. The forum is read-only and every student is automatically subscribed.
  • The Common Room is a general discussion forum where you can exchange and discuss with your colleagues on topics not strictly related to a specific activity. It can be used by all students and the tutor. Please remember to respect the netiquette guidelines when taking part.
  • Discussion forums at unit or activity level can be used by all students and their tutor. Students can post new topics, reply to topics raised by their tutor or fellow students and choose how they see posts and responses.

The sections below will help you use the forums more effectively during your course.

Finding your way around a forum
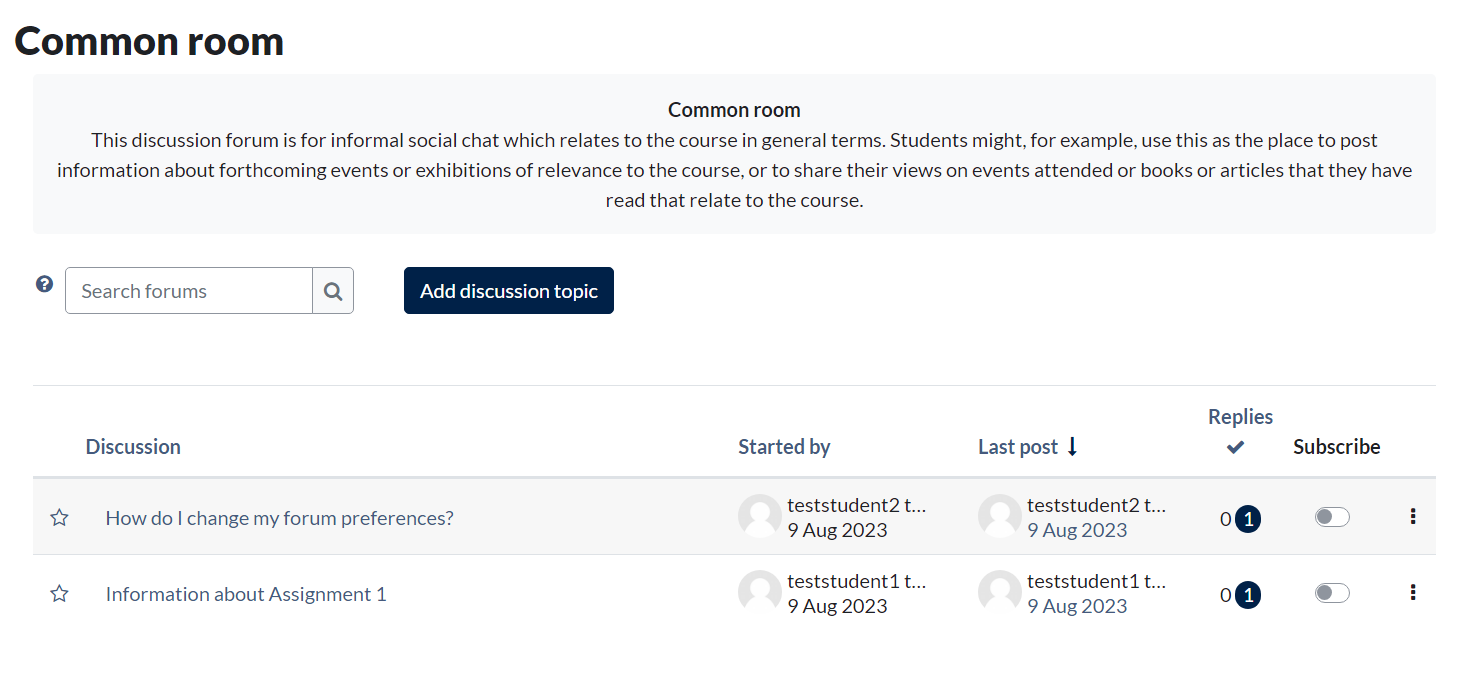
Each forum page is set out in the same format. From here you can see all discussion topics raised in the forum so far.

Star: clicking the star icon at the left of the discussion name will ‘favourite’ this discussion topic. Your ‘starred’ discussions will move to the top of the list.

Discussion: lists the different discussion topics. To read one, just click on its title.

Started by: shows the name of the person who started the discussion topic.

Last post: records the name of the last person to post a reply to the discussion topic and the date they posted their message. By default, the discussion topics are listed in order of the last post, with the most recent at the top.

Replies: shows how many messages have been posted in response to a discussion topic. To read any replies to a message you first need to open the original message by clicking on its title; you will then see any replies listed below the original message.

Subscribe: Provides the option to subscribe or unsubscribe to each discussion topic in the list by turning the slider button on or off. If you subscribe to a forum you will receive email notifications about new posts. See How to subscribe and unsubscribe from discussions below for further information.

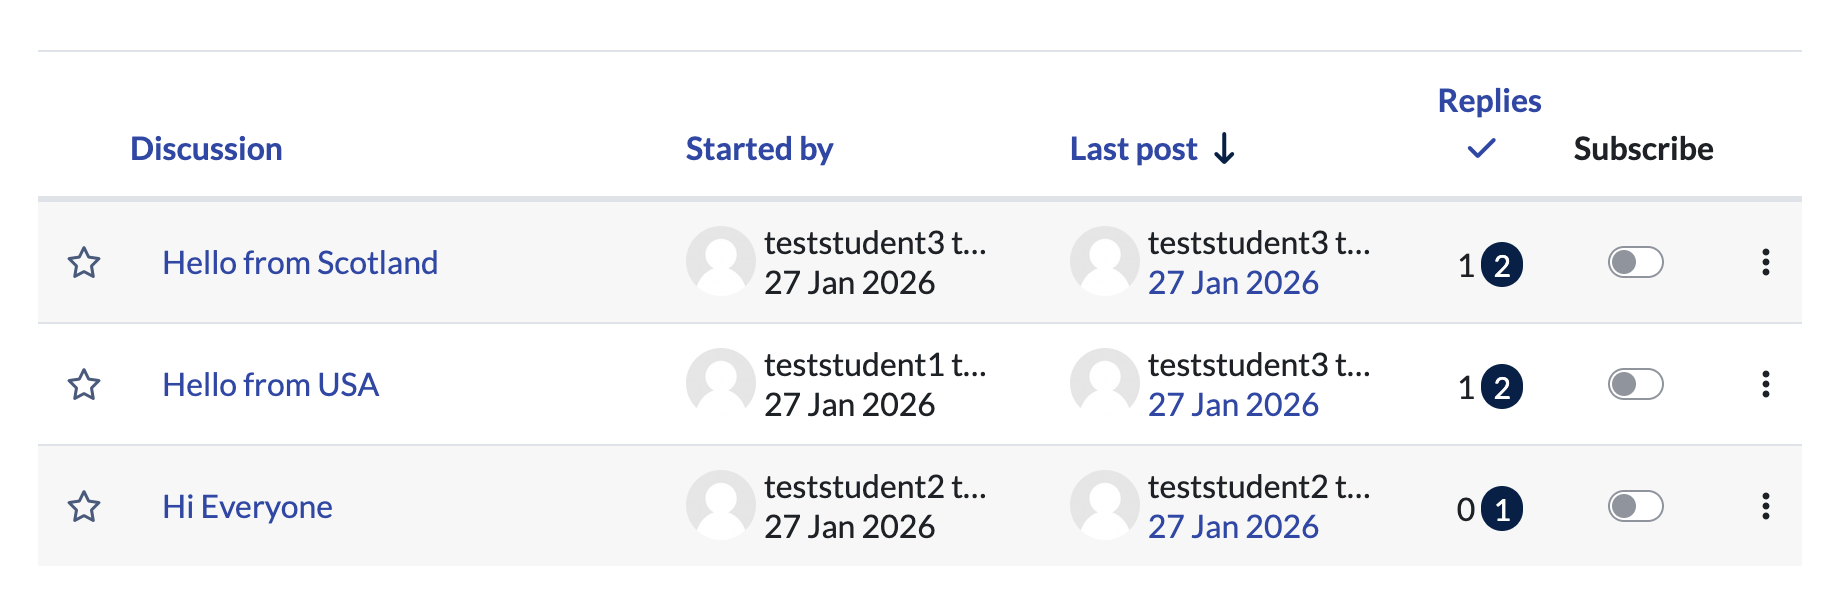
If you have set up Forum tracking in your profile to highlight new posts (see How can I easily see the most recent posts below) you will see any unread posts highlighted in the Replies column. Unread posts are indicated by a small badge  . The number shows how many messages have been posted to a discussion topic since you last viewed it. This is particularly useful for keeping up with long discussions.

Starting and replying to a post

Before you start a new discussion topic (or thread) check the list to make sure the same topic hasn’t been covered in an existing thread. To add your new discussion:

  • Click Add discussion topic.
  • Give your post a meaningful title by typing in the Subject box.
  • Type your post in the Message box.

If you wish to reply to a message in a discussion:

  • Click the discussion title.
  • Click Reply (you will find this located at the bottom of the message), the reply form will then appear.
  • Type your reply in the message box.
  • If you would like to add a picture, emoji or file to your post click on ‘Advanced’ (bottom right).
  • When you have finished, click Post to forum to add your message to the discussion.

Editing your post

Once you have posted a message to a forum you can edit the content for up to 30 minutes from the time you posted your original message.

To do this:

  • Go to your post.
  • Click Edit.
  • Make the edits you wish to make and then click Save changes at the bottom of the page to re-post your updated message.
You must finish editing and re-post your updated message within the 30 minute time period, or your edits will not be accepted.

Adding images, links or attachments to a post

Adding images

To add an image or attach a document to a forum post, select Advanced at the bottom of the message box. Scroll down to the Attachment box (which contains a grey arrow in a circle). Then, either drag and drop your image into the box or select the Add button
Select Choose file (Chrome and Safari) or Browse (Firefox), find and select your image,  Open, then select Upload this file.

Please note – there is a 1MB limit on the size of attachment you can upload.

Adding links

To add a clickable webpage (url) to a forum post, click on Advanced at the bottom of the message box. Then select the text you want to link, and click on the Link button (circled below).
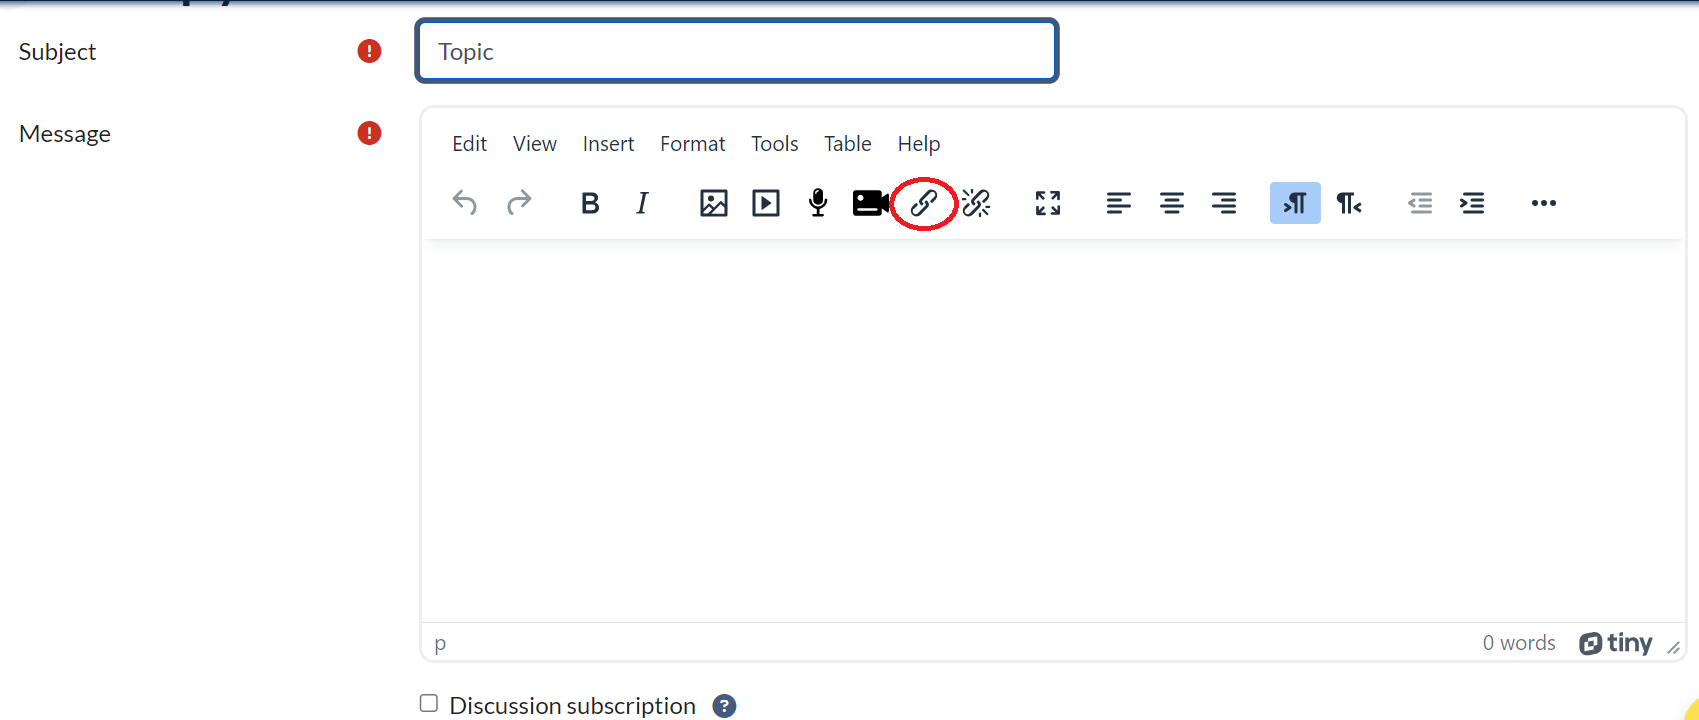
TinyMCE text editor menu options

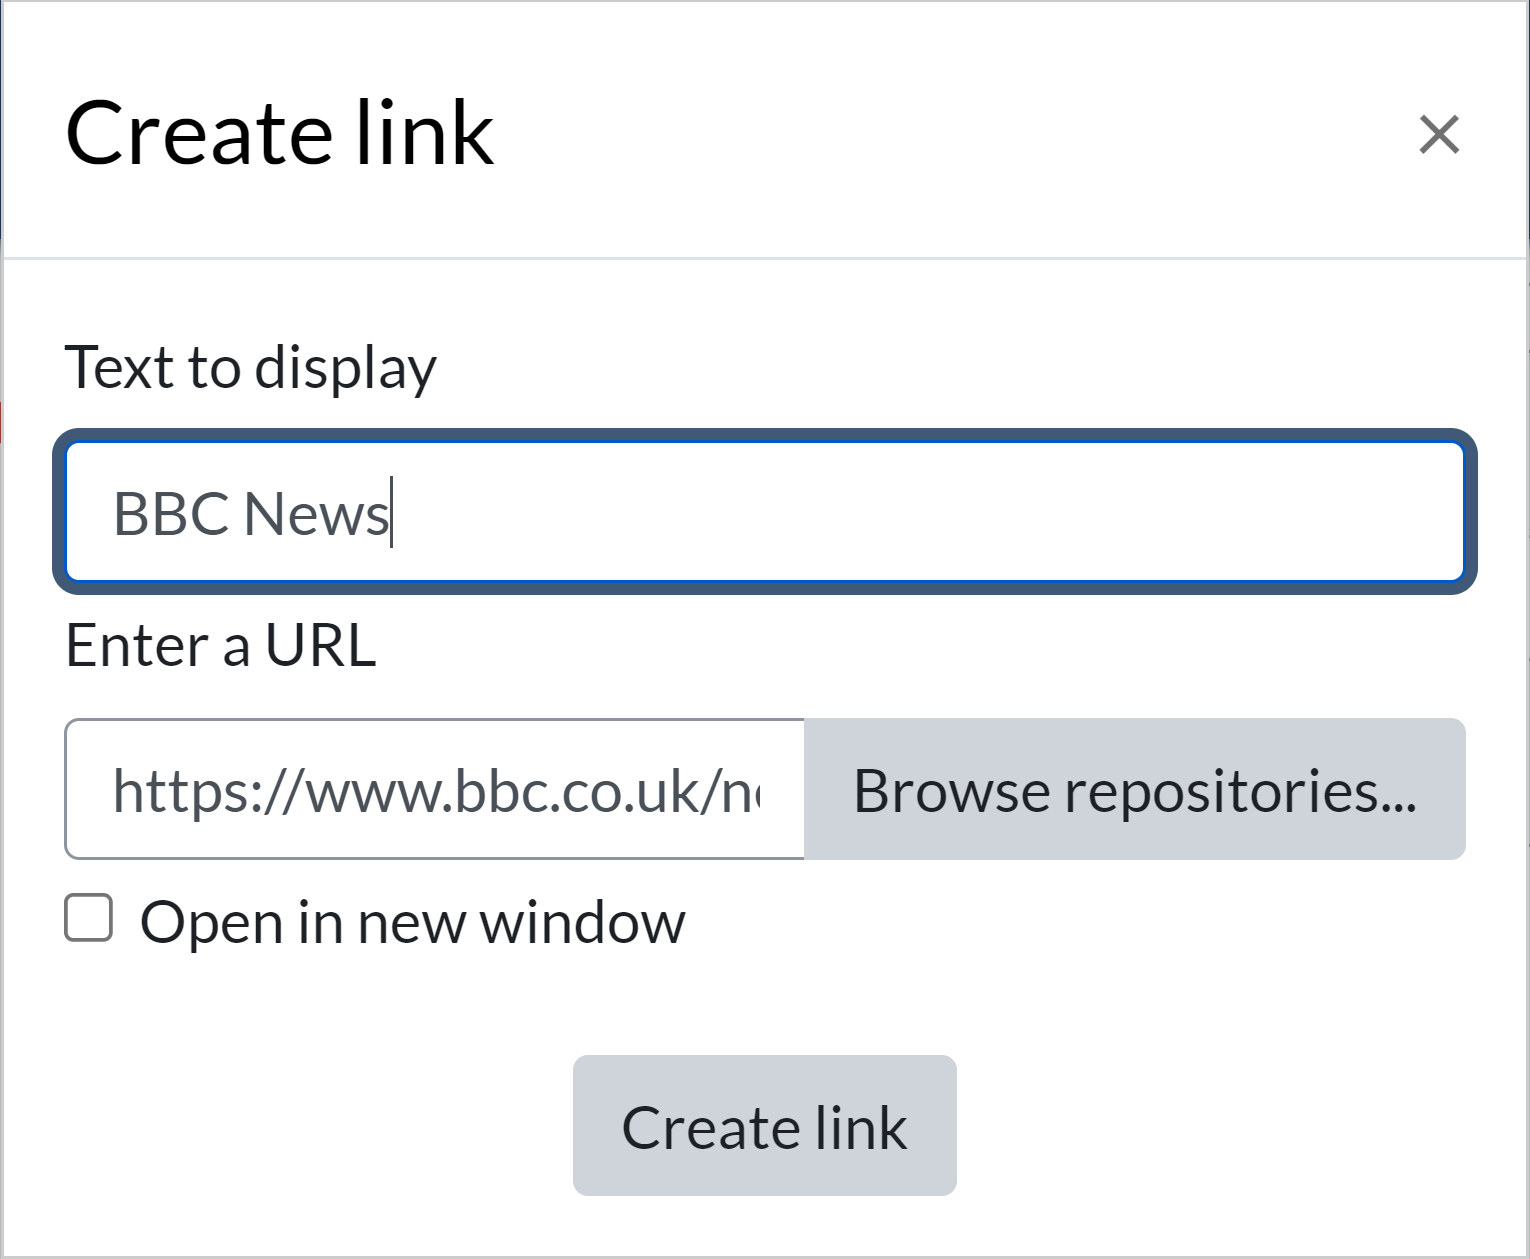
In the Create link screen, you can use the Text to display box if you’d prefer your link to appear as a title or phrase rather than a web address. Then type or paste the web page address (url) into the Enter a URL box. If you’re happy with your link appearing as an address, simply enter it into the URL box and leave the Text to display box blank. Then click Create link.
General guidelines for forum posts

You should be as concise as possible in your messages. If you plan to write a longer message, you may want to write your entry in a text editor or word processing software on your device, and then paste in your completed message to the discussion forum when you have finished.

The draft of your message will autosave every 30 seconds, but many students have found it useful to write posts outside of Moodle and then copy the text across.

Searching forums

If you have read an interesting discussion and want to quickly find it again, you can use the Search forums bar on the forum home page.

To use the search:

  • Enter the text you are looking for in the Search forums bar on the top right of your screen
  • Click the magnifying glass icon next to the search box
  • You will see all posts containing words from your search.

For a more specific search, click on the magnifying glass icon before entering text into the search box. This will display a form with more options, enabling you to carry out a more detailed search.

This search facility only searches the discussion forums and not the full course.

How to subscribe to and unsubscribe from discussions

You can choose to subscribe to specific discussion threads within a forum or to the whole forum. If you are subscribed to a forum you will receive email notifications about posts that have been made. If you would prefer not to receive emails you can either choose to unsubscribe from forums (you will still be able to view posts and reply to them) or change your forum preferences in order to receive fewer emails.

How to subscribe/unsubscribe to a specific discussion topic
  • Click to enter the relevant forum
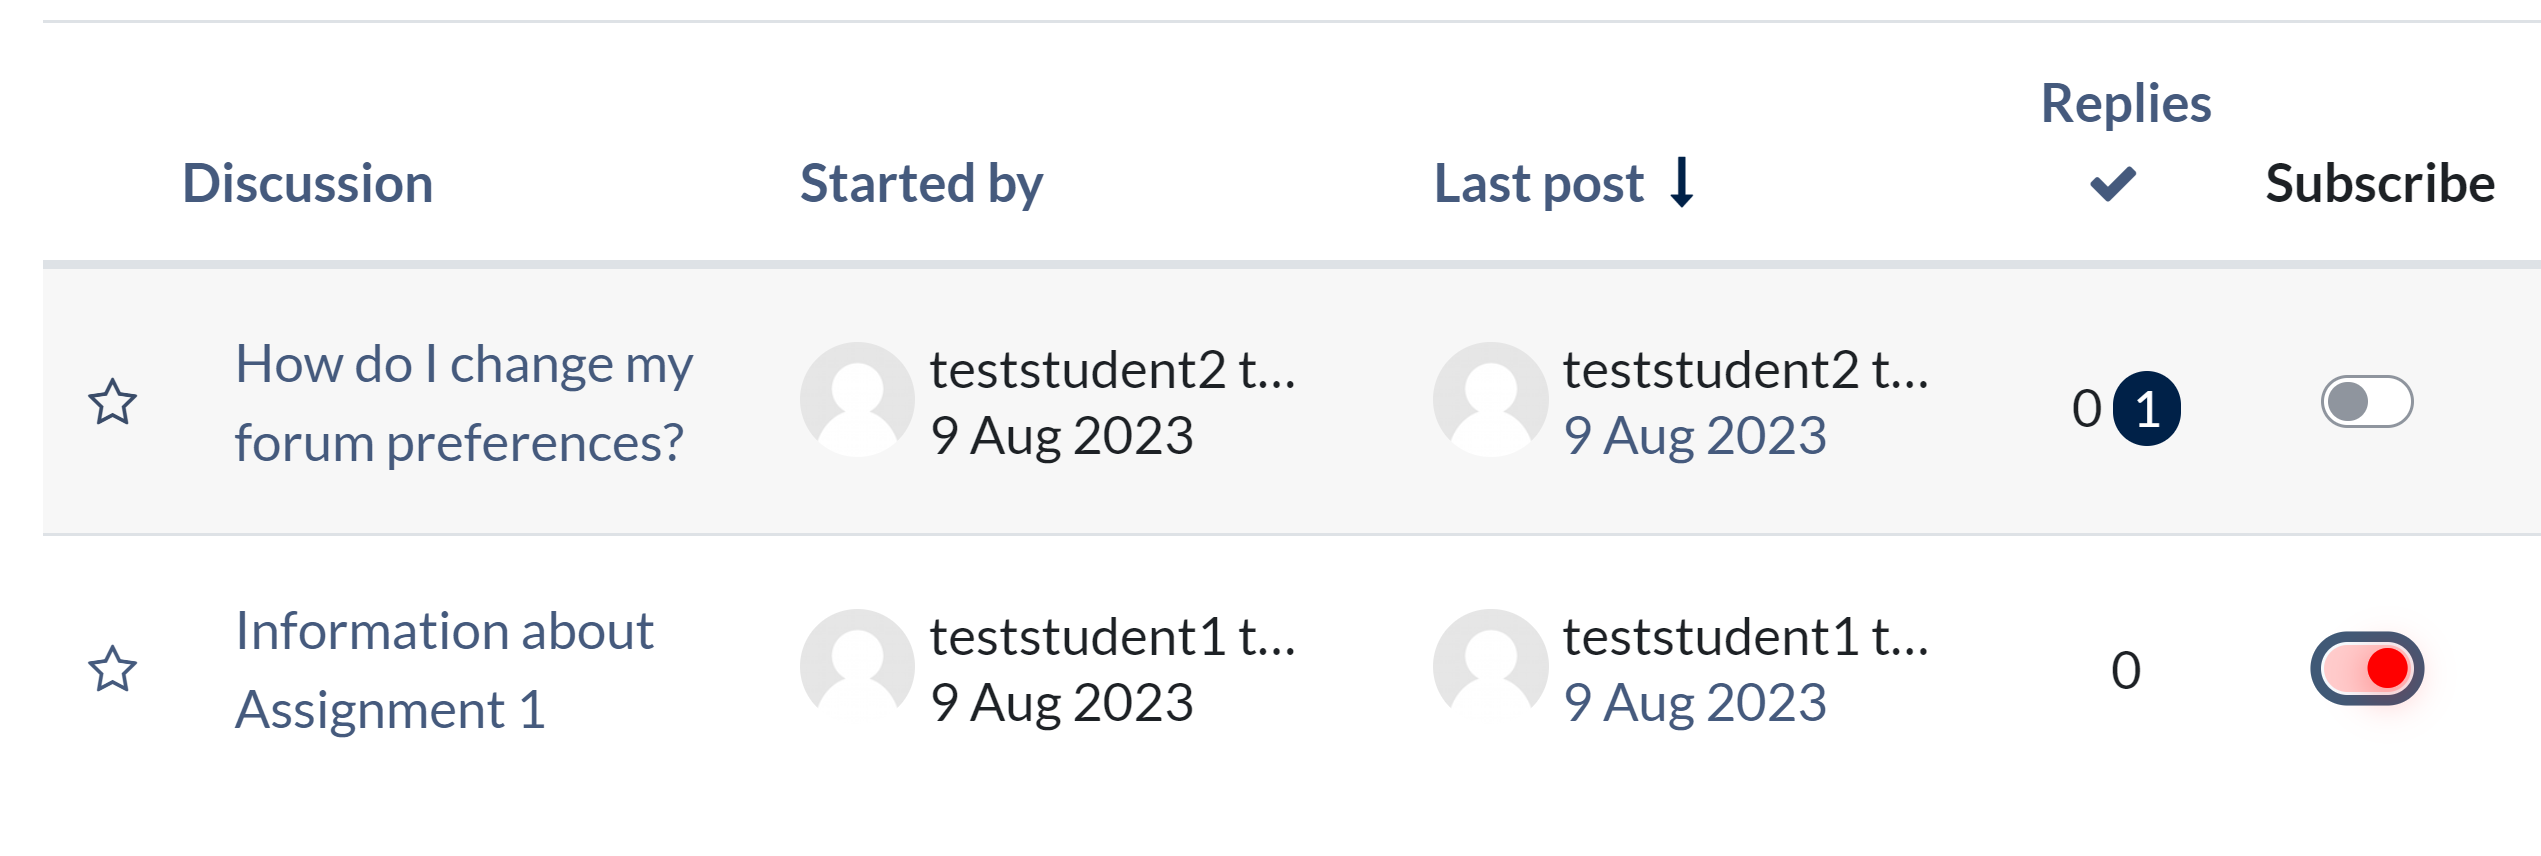
  • Use the slider button that appears in the subscribe column for the discussion topic you want to subscribe to, to turn your subscription on. To unsubscribe click to switch the button off. The image below shows the button in both positions with the second discussion topic subscribed to.
Subscribing to a whole forum

Alternatively, you can subscribe to every thread in a forum by clicking into the forum then clicking the  Subscribe to forum button at the top of the forum

Changing forum preferences

If you are subscribed to a discussion, you will receive an email notification when people create a new post.

You have the option of receiving:

  • an individual email sent 30 minutes after each post is made
  • one “digest” email that collates all posts made in a day, or
  • one email that collates only the titles of each day’s posts.

To change these settings:

  • Click on your name in the top banner to open the User Menu, click Preferences. (NB If you log in via PORTAL you will need to make sure you are on the Portal page to see these options)
  • Click Forum preferences
  • Choose your preferred option from the Email digest type drop down menu.

How can I easily see the most recent posts

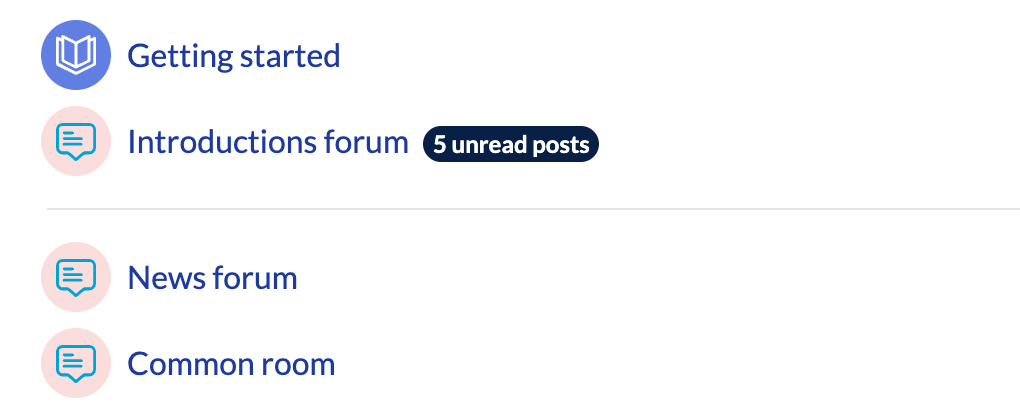
The number of new (unread) posts appears next to the forum title in a small label.
When you enter the forum, you can see two numbers in the reply column. One is the number of posts you have already seen, the other (in a small roundel) is the number of posts new to you (unread).
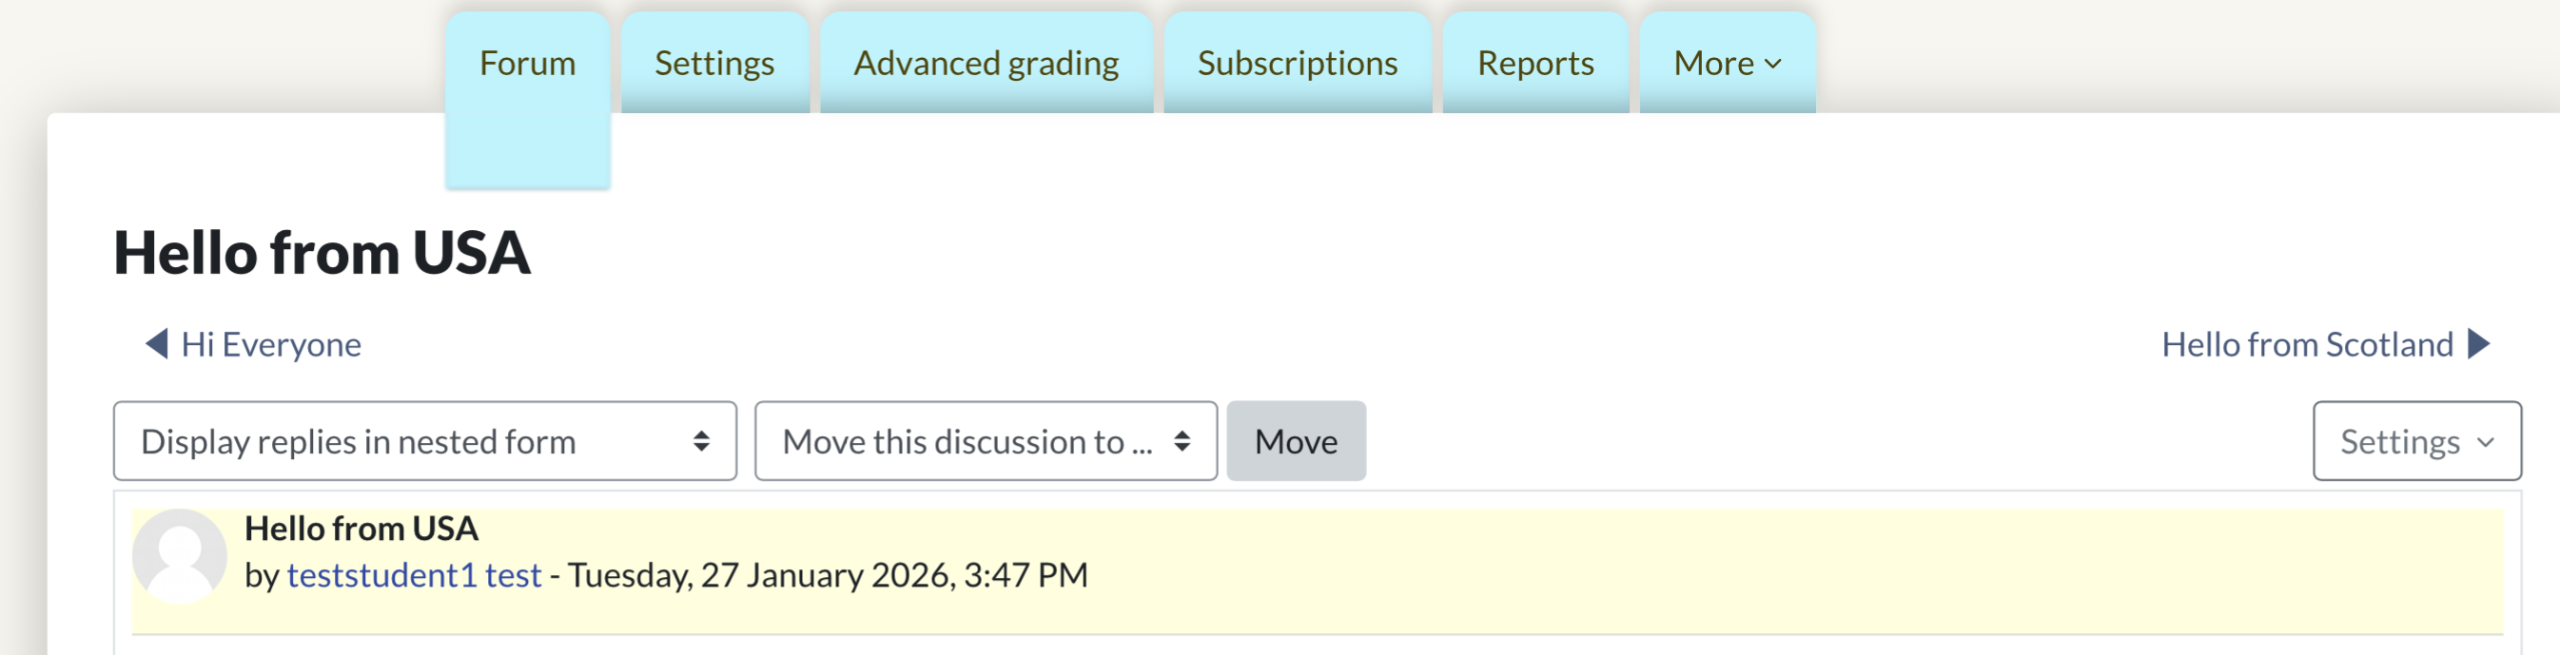
Within each thread unread posts are highlighted in yellow across the top of the post.
Recent Activity

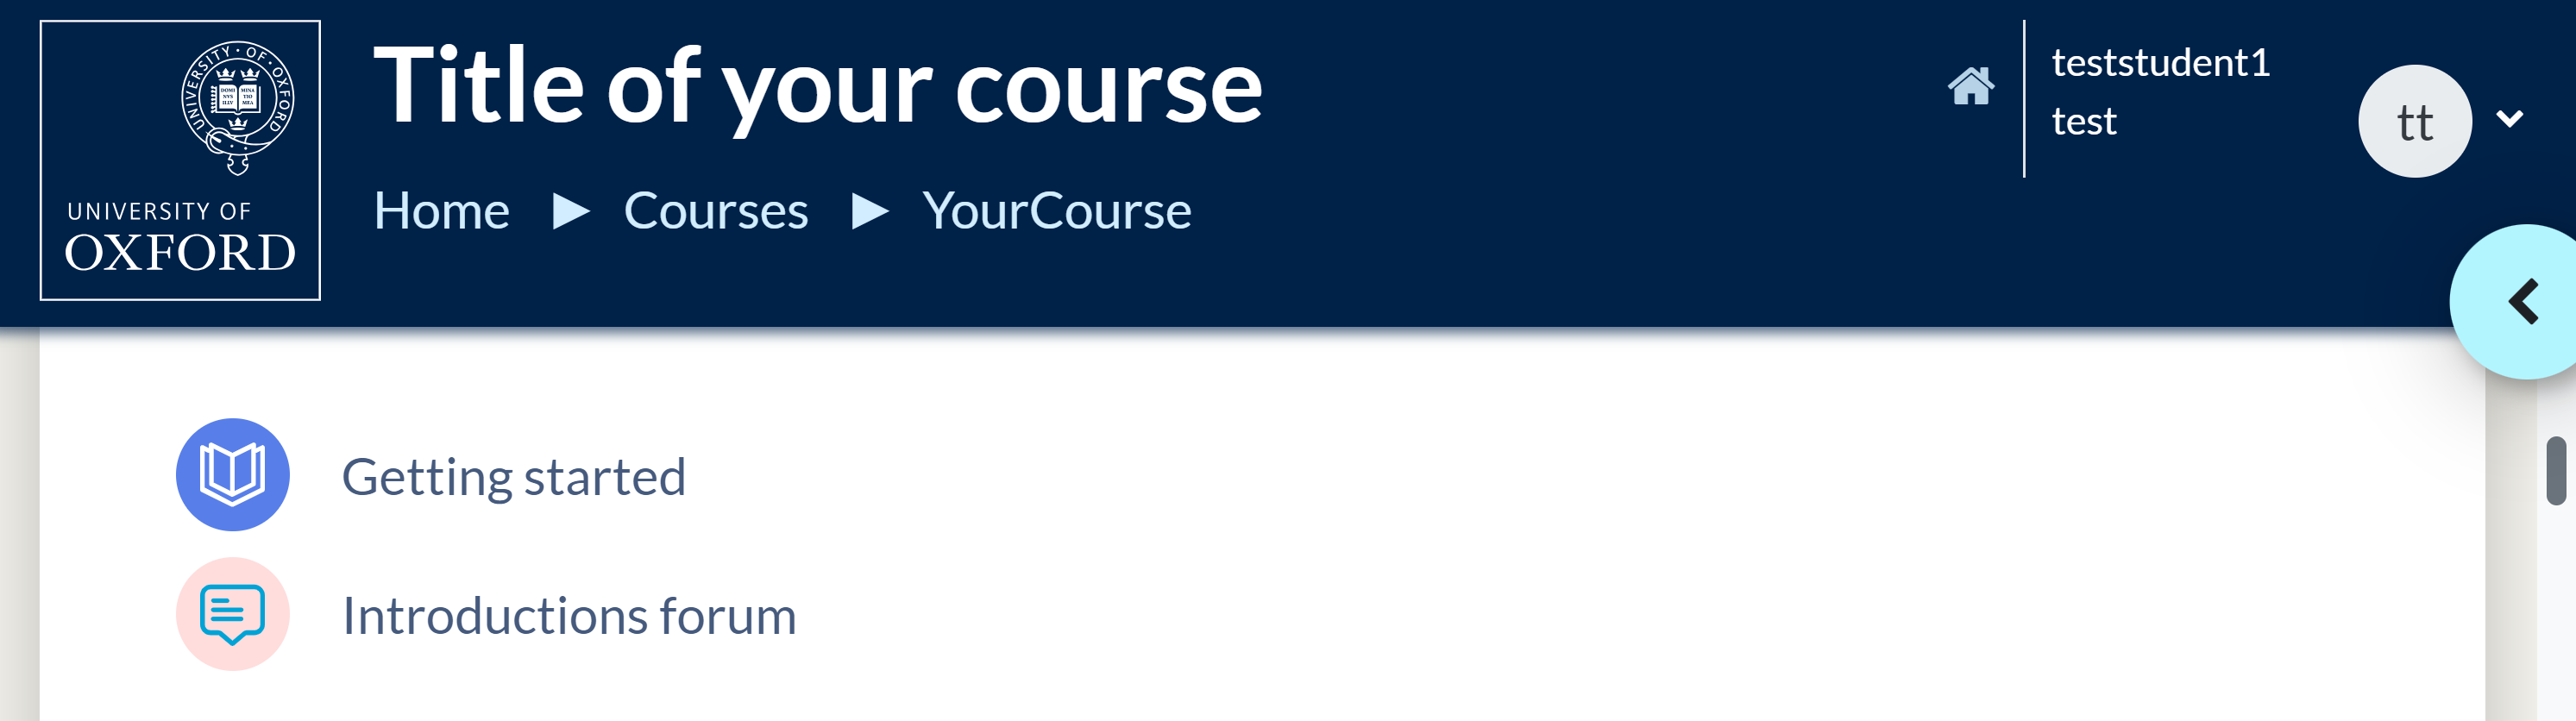
If it is available on your course, you can use the Recent activity block which displays all the posts since you last logged in. You can find this by opening the menu drawer which you can open by clicking the tab at the side of your course (see image below).

Note that clicking on Full report of recent activity in the Recent Activity block also allows you to adjust the time period covered. You can also filter the results further by clicking Show more. This offers options to sort by individual participants, activities, groups and to choose the order in which results are sorted. When you have selected your filters, click Show recent activity to display the results.

Viewing discussions in different ways

The default setting is to display replies in nested form. This shows all replies to a given post slightly indented from that post, and is the best view to help you see how the discussion flows. However, you can change the way messages are displayed by using the drop-down menu at the top of the page.

Flat with newest first can be a useful way of quickly seeing new posts, and threaded form can help you more easily see the shape of a very long discussion thread. We suggest that you experiment with the settings to see which option you prefer.

Viewing all posts/discussions started by an individual or your tutor

Some students find a useful way to engage with the forums is to view all posts by an individual, their tutor for instance. To do this:

  • Go to your course homepage
  • Click on Participants
  • Click on the name of the person
  • In the Miscellaneous section of the profile you can either click Forum posts (which shows all posts by the individual) or Forum discussions (which shows all discussion started by the individual).

Printing course resources

Your course is designed to be studied online. However, you may find that sometimes you want to print out parts of the course material to read away from your computer or to follow instructions while you work on a different section. With this in mind, our courses are designed to produce a clean, clear printout from your browser.

Printing short online course material

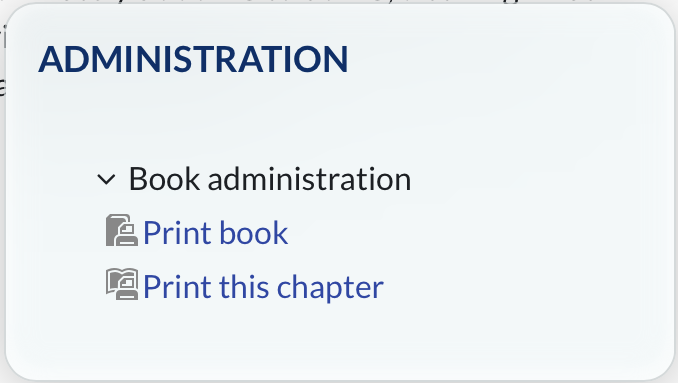
To print your weekly unit content, which is identified on the course homepage by a icon, click on the required unit, click on the blue roundel at the top right of your screen to open the menu drawer and scroll down to find the Administration block.
Click Print book to print the entire unit, or Print this chapter to print the page you are currently viewing. A new window will open with the material formatted for printing. Find the print option in your web browser to print the content.

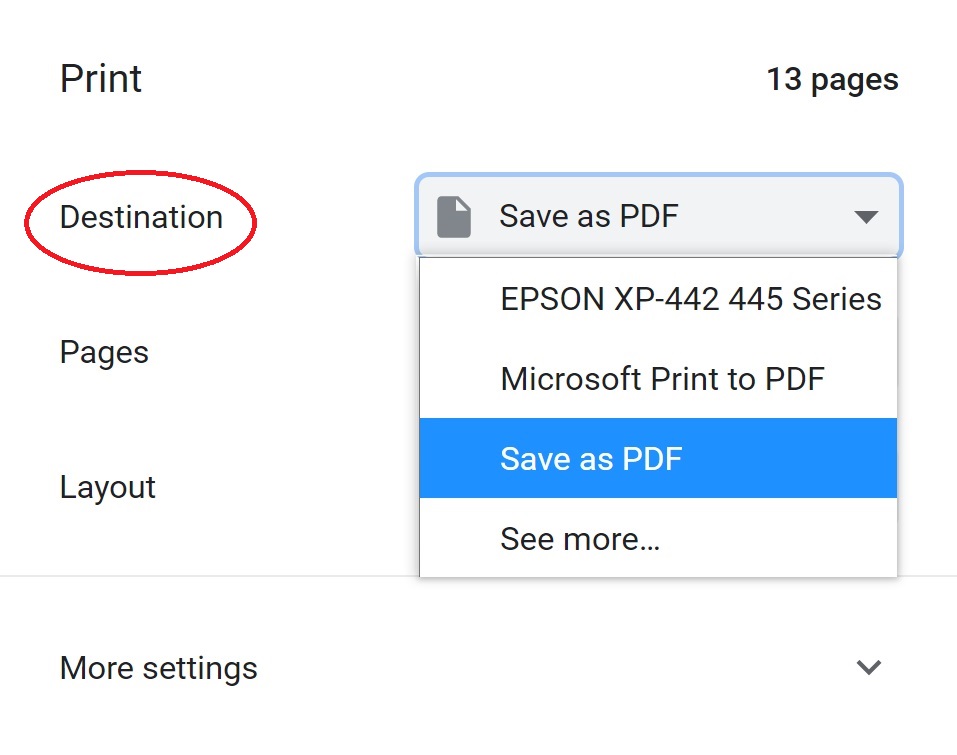
At this point you can use the Destination drop down menu (see image below) to select Save as PDF if you’d prefer to save a copy of the book rather than print it.

There is no option to print the contents of discussion forums. If you wish to save any interesting posts in a forum you will need to copy and paste the text into a text editor and print it out from there.

Printing from courses on Study

Some courses have print versions of the materials which combine all the text from the course into one HTML or pdf file. This allows you to print the contents without having to go into every page individually.

If this option is available, you will find the print versions of your course content at the bottom of the course homepage or relevant section of the course. To print, click on the relevant link and then use the Print option in your browser.

My profile and preferences

Your profile and preferences are accessed differently depending on the type of course you’re studying so please see the note in the box below if you are on a short-course.

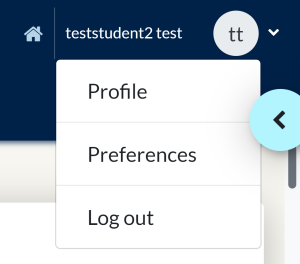
Your student profile is set up to display just your name and the default roundel showing your initials, but you can edit it to introduce yourself and add a picture (or any other image you want to use to represent you) by clicking on your name or initials then choosing Profile (via Study) or Preferences > Edit Profile (via Portal).

NB: The image shown here is what you'll see if accessing your Profile and Preferences from the Study site. If you are on a short-course and log in via Portal you will need to be on the Portal page to update your preferences. If you are in your course and wish to make changes to your profile you will need to go back to Portal to see all the options available.

How do I upload a photo?


To change your picture follow these steps:

  • Click on your name in the top banner.
  • Click Preferences or Profile.
  • Click Edit Profile.
  • Scroll down the page to the heading User Picture – click on the heading to open up this section.
  • Drag and drop your image file into the box with the grey arrow in a circle at the centre, or search for the file using the icon.
  • Once you are happy with the changes you have made, click Update Profile at the bottom of the screen.

If you log into your course via Portal make sure you are on the Portal page otherwise you will not see all the available options.

Changing your password


If you log into your course via Study using your SSO details and wish to change your password, you can do this using the Change Password page.

If you access your course via Portal with a Moodle username and password follow these steps to change your password:

  • Click on your name in the top banner.
  • Click Preferences.
  • Click Change password.
  • Follow the steps on screen to change your password.
  • When you are happy with your changes, click Save Changes at the bottom of the screen.

Please be aware that this password change will only affect access to Portal. Your password for all other systems will remain unchanged.

Changing your Forum preferences

  • Click on your name in the top banner.
  • Click Preferences.
  • Click Forum preferences.
  • Read and select your preferred options, there is more information on these in the Discussion forums section. It is helpful to select Yes to Forum tracking as this allows new posts to be highlighted when you log into your course.
  • Once you are happy with the changes you have made, click Save Changes at the bottom of the screen.

For information on changing your forum subscriptions see the Discussion forums page.

Finding your way around

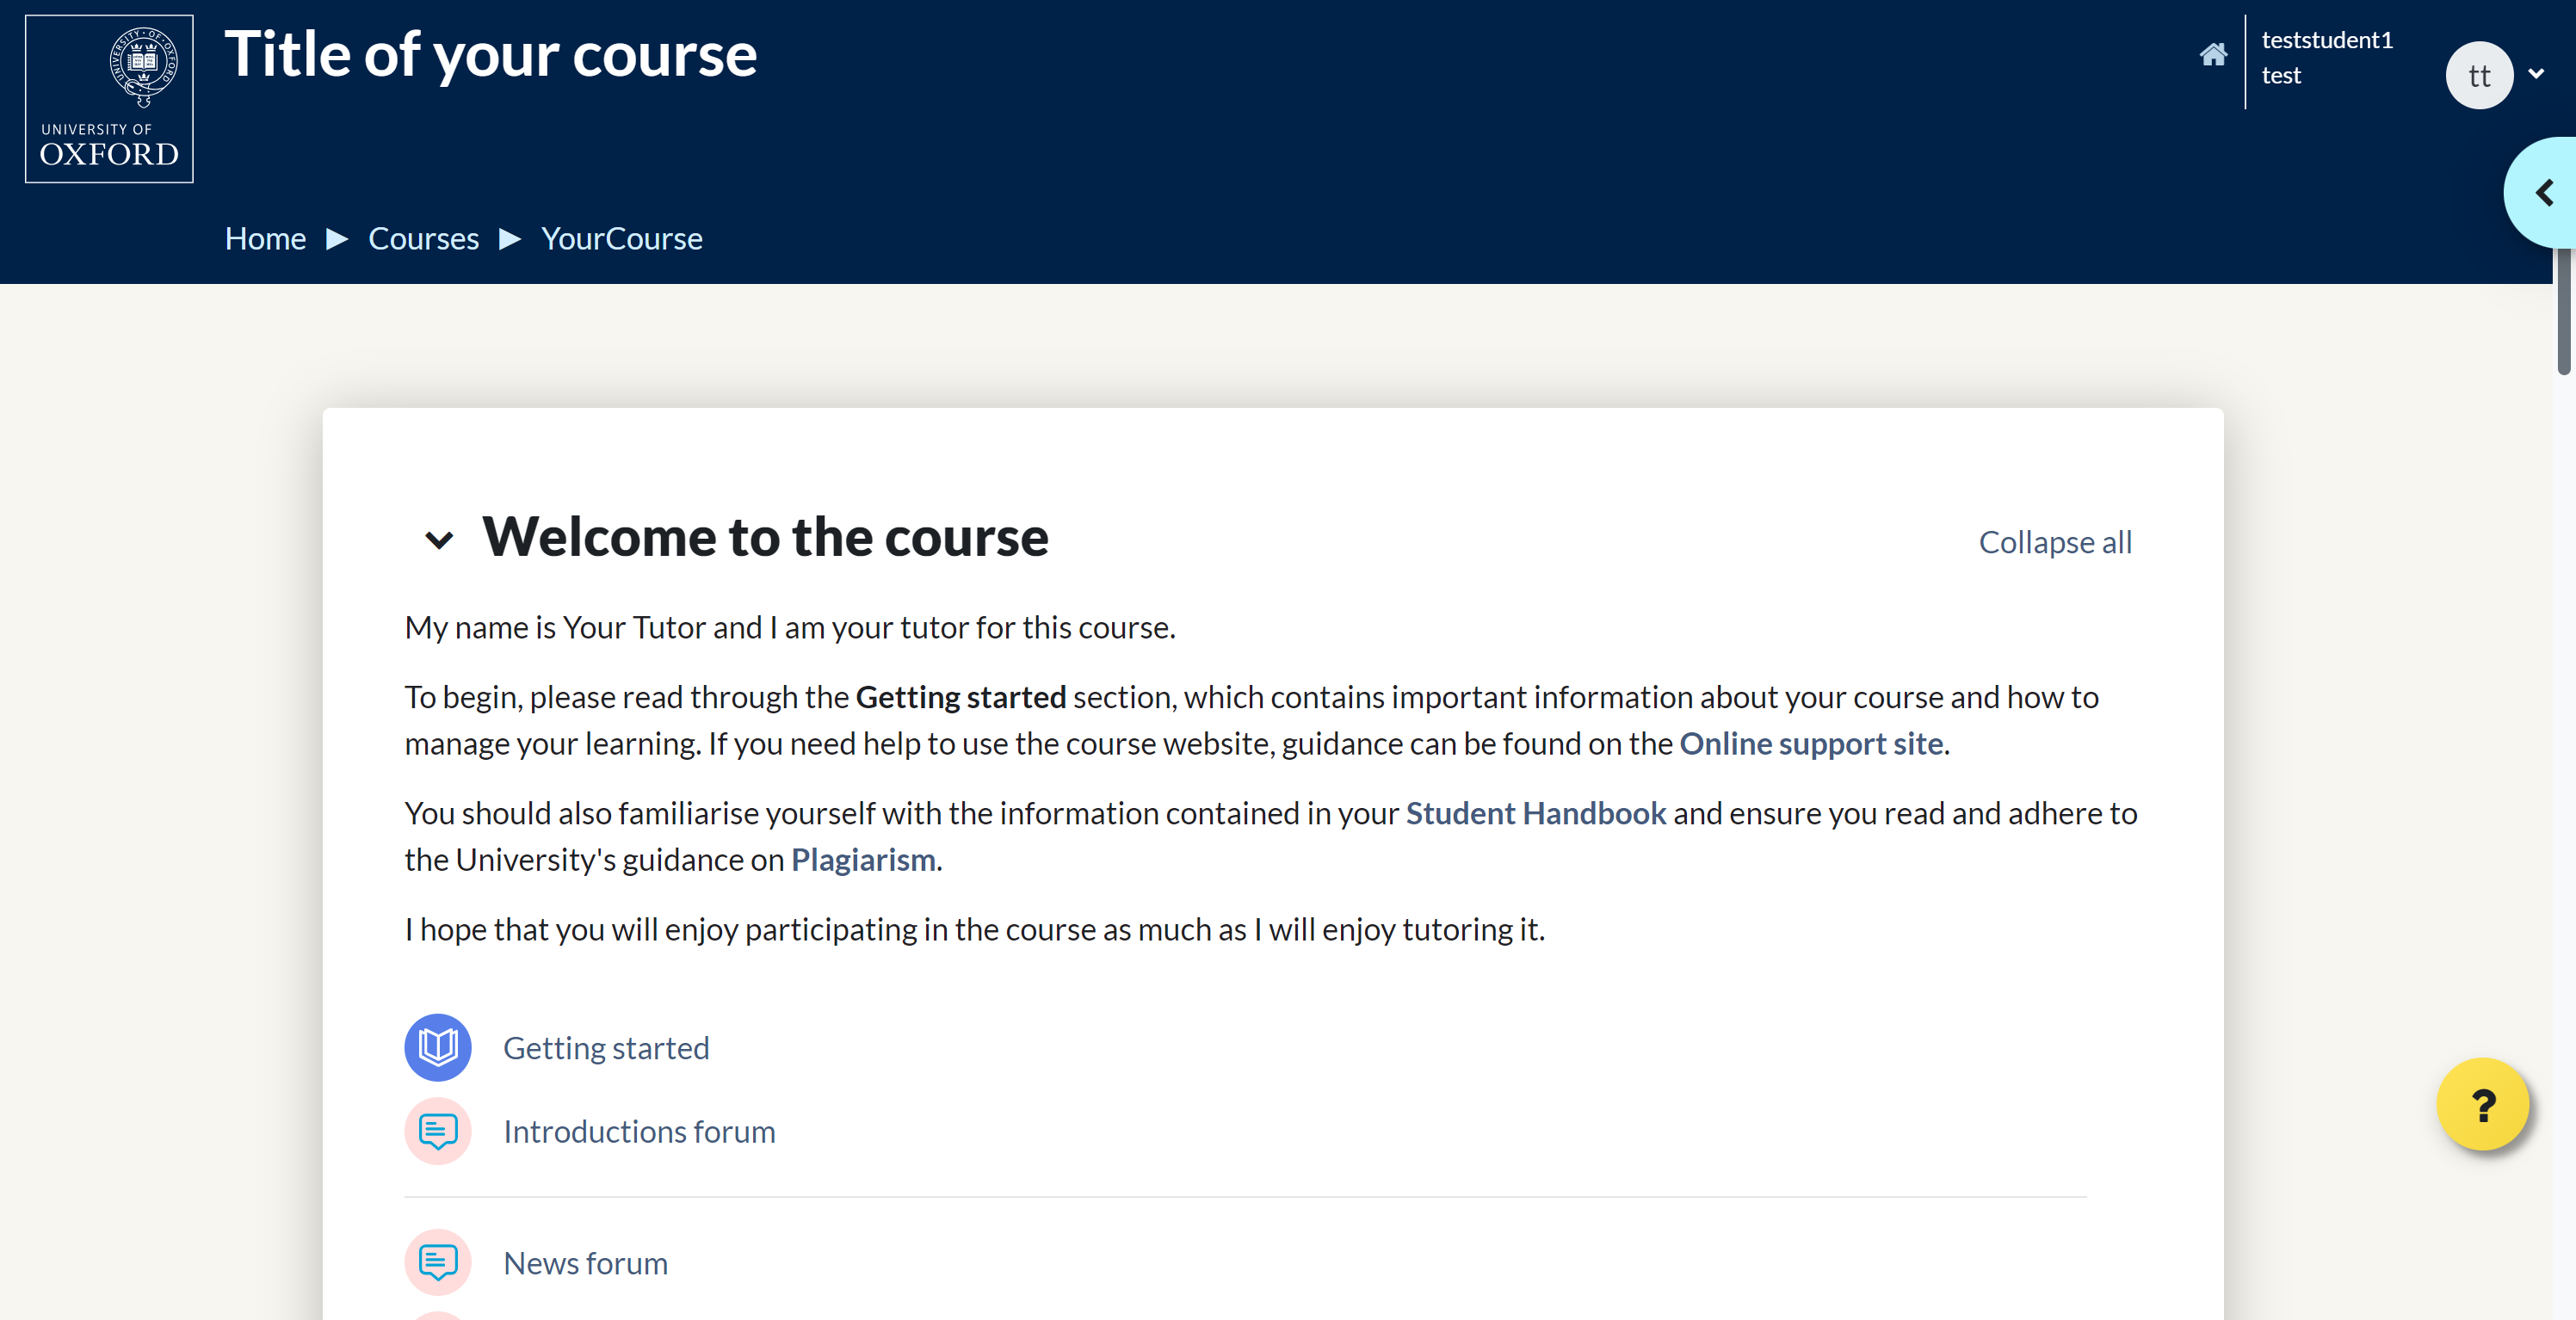
This section introduces the course homepage and explains how to navigate your way around the course website and the course materials. When you access a course, you can see your course material. There is a user menu to set your preferences and complete your personal profile, and a collapsed menu drawer. See below for details of each.

Please note: The screenshots below are illustrative only. Your course may not include all the blocks shown here in the menu drawer, and may include others not shown here.

Your course homepage

Your course homepage will be the main page you use to access the course materials, activities and other features of your course. You can scroll down to access the materials for each unit or module.

If you are studying a short course, the main course material for you to study each week is indicated by the book icon. You may also see forums, chat sessions, polls, surveys, InfoMaps and any other activities or resources you will use during your course.
User menu

Selecting the user icon in the top right-hand corner of the screen gives you access to the user menu, where you can upload a profile picture, change your notification settings and preferences.

Menu drawer

You will be able to access advanced tools and functionalities in the Menu drawer. To see it, you can click on the thumbnail with an arrow in the top right-hand corner of your screen menu drawer icon.

When the Menu drawer expands, you will be able to scroll up and down to see a number of blocks as described below.

Please note, the blocks available in the drawer may be different depending on which page you are on, and which course you are studying.

The Navigation block
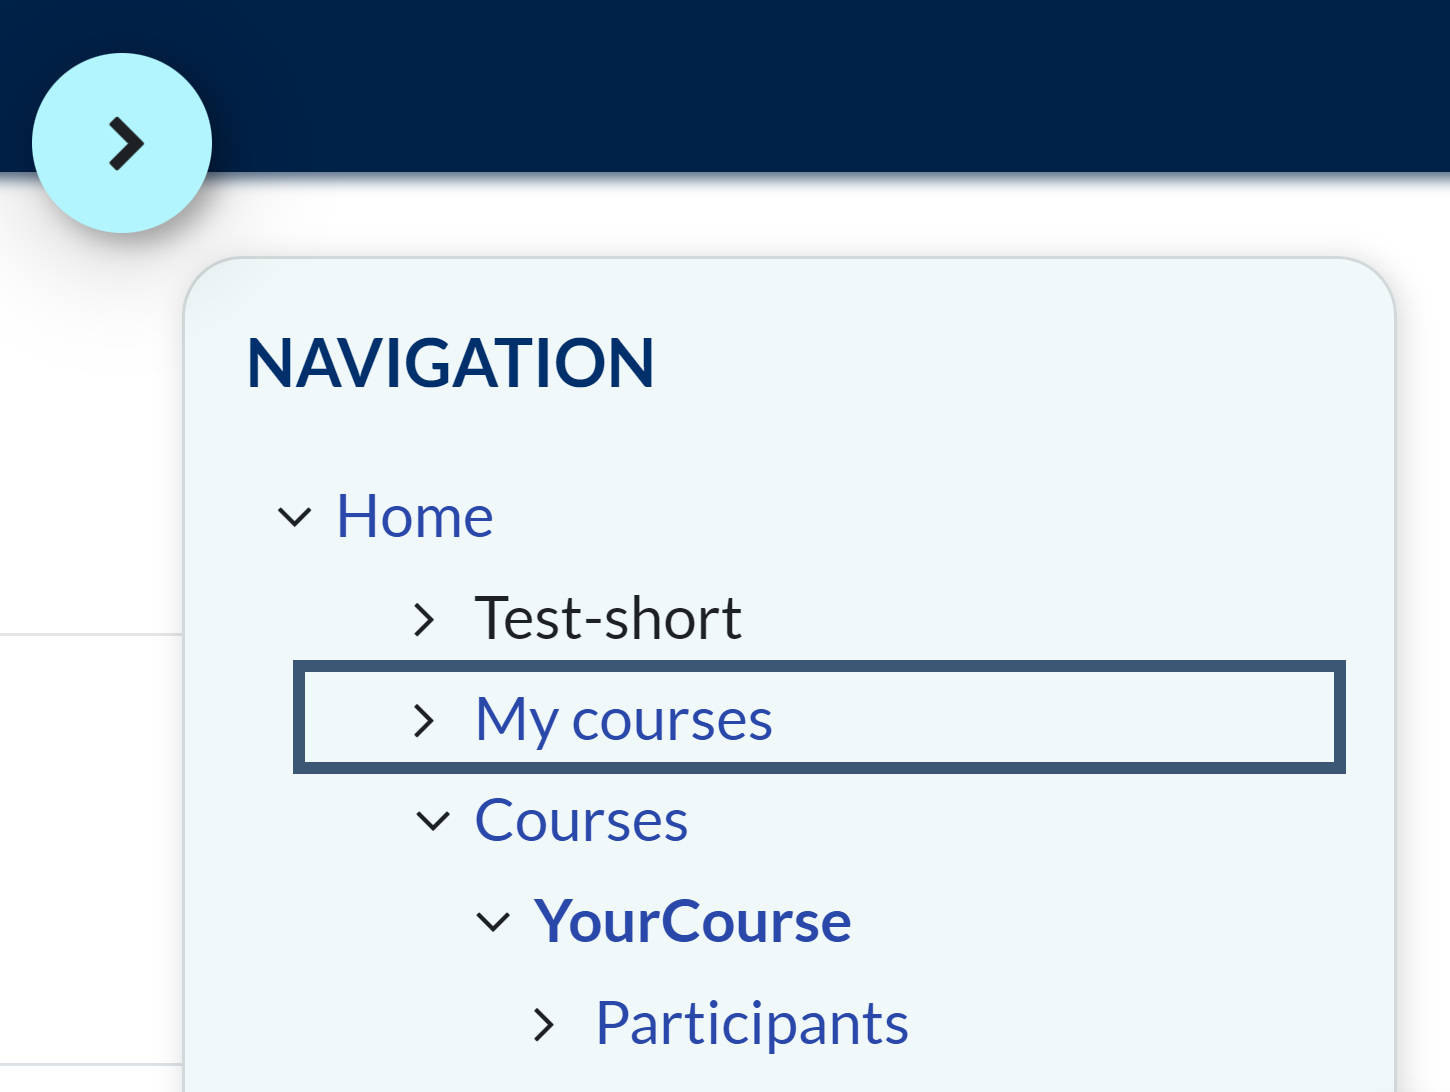
You can move around your course materials via the Navigation block.

Clickarrow icon to expand the relevant section and click any of the links to navigate to that section or feature of the course. From here you can move from one unit to another, without going back to the course homepage.
You can also use the breadscrumb trail in the website header, below the course name. Click on your course title in the top banner at any point to return to the course homepage. You can also use your browser’s back and forward buttons.

Other blocks
Below the Navigation block, you will see a number of other blocks. These provide essential tools and resources to help you study online. Your course will contain some or all of the following blocks. For example, the search forum, recent activity, and activity shortcut blocks.

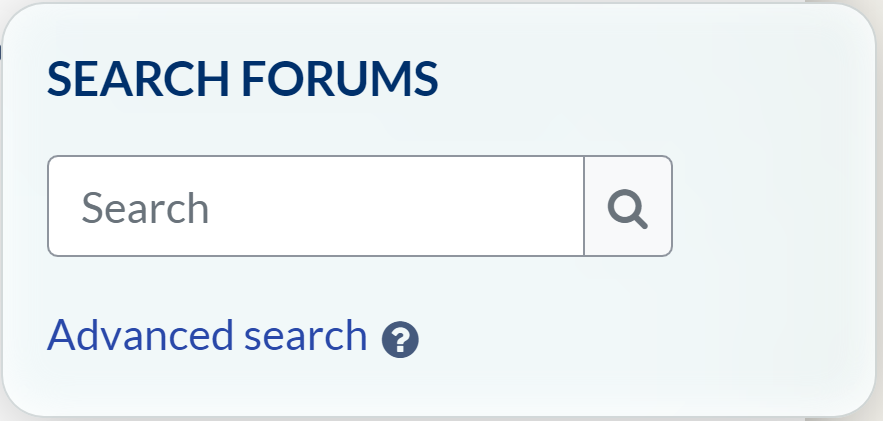
Search forums

To search the forums, enter the text you are looking for in the box and then click the spy glass icon. For a more specific search, click Advanced search. Remember the search facility only searches the discussion forums, not the course materials.

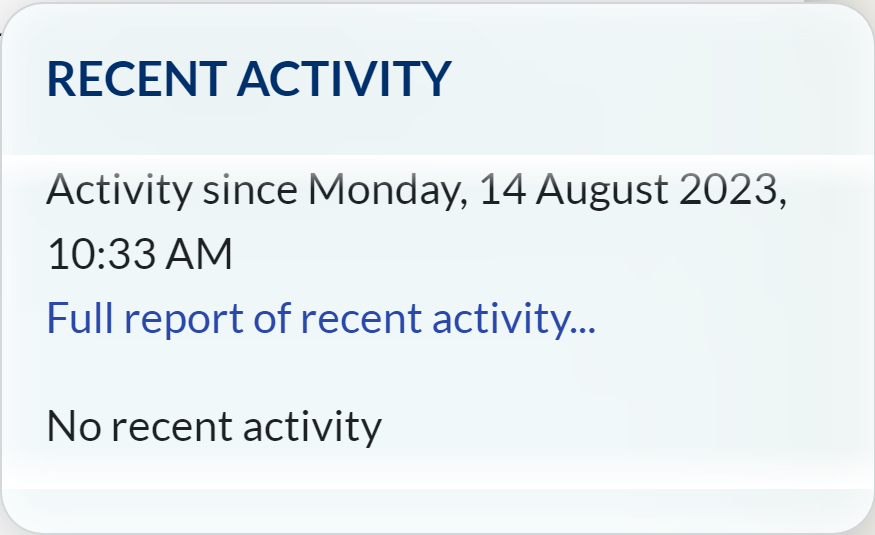
Recent activity

This displays a list of recent activities within the course, together with a link to the item and a full report of all recent activity. The number and nature of the items displayed will depend on the amount and type of activities included in the course.

You may find this block particularly useful to see if any new postings have been made in the discussion forums since you last logged in.

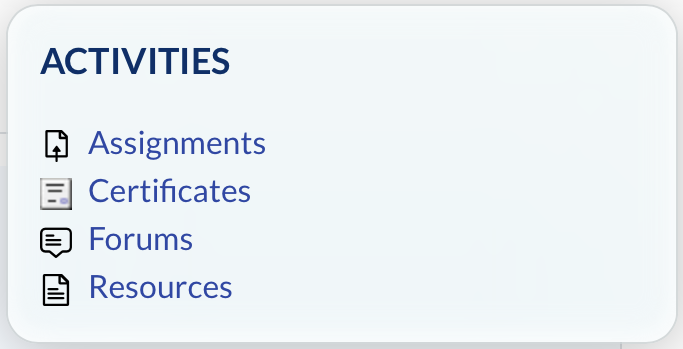
Activities

This lists the different activities available in your course. Clicking on a link will display a list of all available activities of that type.

The most commonly used activities are Forums and Assignments. Forums are a central part of an online course so for more details on how to use the forums see the Discussion forums page.

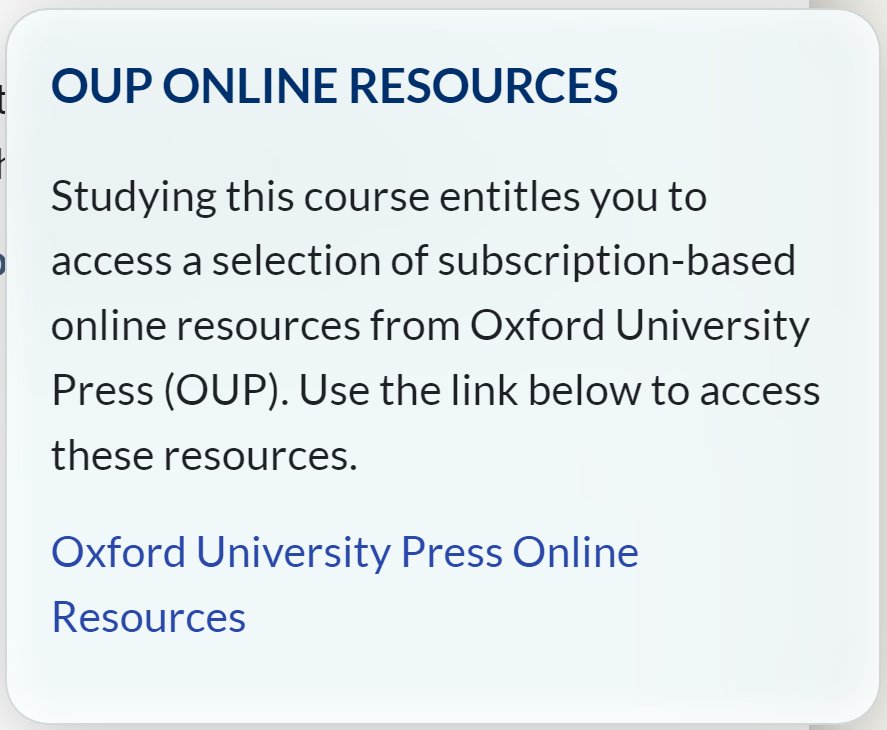
Oxford University Press Online Resources

Access to Oxford University Press Online Resources is available to some students.

If you are studying a short course with access to Oxford University Press Online Resources, you can access the resources via the link in the OUP Online Resources block. There may also be links to specific resources in your course materials. There is more information on the Oxford University Press online resources page.

Administration

This provides you with context-sensitive options and you will see a different list of links for different features of the course.

For example, if you are on a short course and navigate to a unit and then a chapter, you will see options to print the content of that chapter or the entire book. If you look at the Administration block when you are in a forum you will see options to subscribe and unsubscribe to that forum.

How to log in to your course

When your course begins you will be sent a web address (url) for your login page. Two of the most common sites for our students are portal.conted.ox.ac.uk which is used for short online courses, and study.conted.ox.ac.uk which is used for award-bearing courses, among others. You can find out from your course administrator which site you should log in to, or refer to your joining instructions email or handbook.

If you are studying one of the very few courses that use neither Portal or Study, please follow the instructions for Portal substituting your course website address.

Follow the instructions below for your particular course site.

How to log in to your short online course via Portal

For most of our short online courses you will log in using Portal. If this is your first time studying with us, you will receive your username and password from the Online Courses Office on the day your course starts. For continuing students your username and password will remain the same.

To log in:

Once you are logged in you can use the Portal to update your profile.

When you are ready to view your course you can find it using one of the following routes.

Either, click on your course title under My courses. Or, click on the appropriately named term link under CURRENT or PREVIOUS terms. Then, find your course by clicking the blue roundel at the top right of the page to open the menu drawer and clicking your course name under My courses in the NAVIGATION box.

How to log in to your course via Study

Using your University of Oxford Single Sign-On details

If you log in to your course using Study you will usually use your University of Oxford Single Sign-On details, often referred to as your “SSO” username and password. You will receive details from the university explaining how to activate your SSO username and password. Once you have activated your SSO you can use these details to log into Study.

To log in:

  • Go to https://study.conted.ox.ac.uk
  • Click on the Log in button
  • Enter your username followed by @OX.AC.UK, (i.e. abcd1234@OX.AC.UK, where abcd1234 represents your existing SSO username)
  • Enter your SSO password (NB passwords are case-sensitive)
  • Click Sign in
  • Follow the necessary steps to authenticate your login.
Using a temporary Moodle username and password

If you are issued with a temporary Moodle account, you will use these details to log in until your SSO is available. Once your SSO is available please contact us to switch your account over.

To log in:

  • Go to https://study.conted.ox.ac.uk
  • From the log in page, click on Moodle account login
  • Enter your username
  • Enter your password (NB passwords are case-sensitive)
  • Click Log in

This should take you to the Study homepage and from here you can make any changes to your details.

When you are ready to view your course click on the blue roundel at the top right of the screen to open the menu drawer. Then click to select your course under My courses in the NAVIGATION block.

I’m still having trouble logging in

If you are still having trouble logging in you may be able to resolve the problem yourself using the advice below.

Logging in to Study
  • If you cannot remember your username and/or password, or if you are unsure of either, then go to Webauth to reset your password.
  • Go to the log in page and press Control and F5 together (Ctrl +F5) on your PC keyboard to clear any stored passwords.
Logging in to Portal
  • Click on the Forgotten your username or password? link on the login page to reset your password.
  • Once your password has been changed press Control and F5 together (Ctrl + F5) on your PC keyboard to clear any stored passwords.

If you are still having difficulty, please contact us.